This the multi-page printable view of this section. Click here to print.
Tutorials
- 1: cms
- 2: Git
- 2.1: Git pull requst
- 2.2: Adding a SSH Key for GitHub Repository
- 2.3: GitHub gh Command Line Interface
- 2.4: GitHub hid Repository
- 3: REU Tutorials
- 3.1: Installing PyCharm Professional for Free
- 3.2: Installing Git Bash on Windows 10
- 3.3: Using Raw Images in GitHub and Hugo in Compatible Fashion
- 3.4: Using Raw Images in GitHub and Hugo in Compatible Fashion
- 3.5: Uploading Files to Google Colab
- 3.6: Adding SSH Keys for a GitHub Repository
- 3.7: Installing Python
- 3.8: Installing Visual Studio Code
- 4: Tutorial on Using venv in PyCharm
- 5: 10 minus 4 Monitoring Tools for your Nvidia GPUs on Ubuntu 20.04 LTS
- 6: Example test
- 7:
1 - cms
1.1 - Using Shell.download to Download Files

Learning Objectives
- Install
cloudmesh.common - Use
Shell.downloadfromcloudmesh-commonto download files from the internet.
Requirements
python3 --version> 3.8
Topics covered
Python 3 venv
Best practice is to use a venv in python to isolate your custom python instalation:
$ python3 -m venv ~/ENV3
$ source ~/ENV3/bin/activate
or
$ ~/ENV3/Scripts/activate.exe
in Windows gitbash.
Installation of cloudmesh.commn
Install cloudmesh-common with:
pip install -U pip
pip install cloudmesh-common
Usage of Shell.download
Shell.download leverages the streaming capabilities of the requests library for large files.
Example download of image where underlying downloader is requests:
$ python3
Python 3.9.4 (v3.9.4:1f2e3088f3, Apr  4 2021, 12:32:44)
[Clang 6.0 (clang-600.0.57)] on darwin
Type "help", "copyright", "credits" or "license" for more information.

>>> from cloudmesh.common.Shell import Shell
>>> file_url = 'https://github.com/cloudmesh/pi/blob/main/content/en/tutorial/example/featured-image.png?raw=true'
>>> destination = '~/Desktop/image.png'
>>> Shell.download(file_url, destination)
/users/you/Desktop/image.png: 100%|#########| 22.6k/22.6k [00:00<00:00, 3.58MB/s]
'/users/you/Desktop/image.png'
Configuring the Download Cache
Shell.download only downloads if the filename in the destination does not
already exist. If you like to change the behavior and ignore it, you need to use
the force parameter.
Shell.download(file_url, destination, force=True)
Different Providers for Shell.download
Example where provider is system. Cloudmesh Shell will first try to use
wget then curl (if wget fails)
$ python3
Python 3.9.4 (v3.9.4:1f2e3088f3, Apr  4 2021, 12:32:44)
[Clang 6.0 (clang-600.0.57)] on darwin
Type "help", "copyright", "credits" or "license" for more information.

>>> from cloudmesh.common.Shell import Shell
>>> file_url = 'https://github.com/cloudmesh/pi/blob/main/content/en/tutorial/example/featured-image.png?raw=true'
>>> destination = '~/Desktop/image.png'
>>> Shell.download(file_url, destination, provider='system')
sh: wget: command not found
  % Total    % Received % Xferd  Average Speed   Time    Time     Time  Current
                                 Dload  Upload   Total   Spent    Left  Speed
100   153  100   153    0     0    467      0 --:--:-- --:--:-- --:--:--   467
100   164  100   164    0     0    379      0 --:--:-- --:--:-- --:--:--   379
100 22590  100 22590    0     0  43694      0 --:--:-- --:--:-- --:--:-- 43694
INFO: Used curl
'/users/you/Desktop/image.png'
>>>
We can see here that Shell.download uses curl and not wget. This is
because the example system did not have wget as a
terminal ('system') command installed.
Installing other Download Programs
Your OS typically has defined mechanisms to install commands such as curl and wget.
If they are not installed. Shell.download will use Python requests automatically.
If you like to use wget r curl you need to install them.
On Ubuntu you can fro example say
$ sudo apt install wget
or
$ sudo apt install curl
Please find the method that works for your system, or use the default method which does not require a third party provider.
The order of the providers is defined as
- wget
- curl
- Python requests
We use wget and curl first as many OS have optimized versions of them.
2 - Git
2.1 - Git pull requst
It is very easy to help us modifying the Web Site through GitHub pull requests. We demonstrate this via the commandline and via the GitHub GUI.
The commandline can be run form any computer with Linux, Windows, and macOS. ON Windows you need to install gitbash and use that. THis way you have a commandline terminal that just works like on LInux and OSX.
Github Pull Request via the commandline
9:15 min
Github Pull Request via the GitHub GUI
2.2 - Adding a SSH Key for GitHub Repository
Jacques Fleischer, Gregor von Laszewski
Abstract
We present how to configure an SSH Key on GitHub so that you can clone, commit, pull, and push to repositories. SSH keys provide an easy way to authenticate to github. Together with ssh-agent and ssh-add it allows you to do multiple commtits without having to retype the password.
Contents
Keywords: ssh
Documentation for Linux and macOS
Please follow the Windows documentation, but instaed of using gitbash, pleas use the regular terminal. on macOS, make sure you have xcode installed.
Uploading the SSH key
Please ensure that you have Git (Git Bash) and a repository on GitHub. This tutorial assumes you already have a GitHub repository as well as a GitHub account.
-
Open Git Bash by pressing the Windows key, typing
git bash, and pressing Enter. -
Then, go on GitHub, click on your profile icon in the top right, click
Settings, and clickSSH and GPG keyson the left hand side. Confirm that there are no SSH keys associated with your account. If there are keys, then perhaps you have made some already. This tutorial focuses on creating a new one. -
Go back to Git Bash and type
ssh-keygen. PressEnter. PressEnteragain when it asks you the file in which to save the key (it should sayEnter file in which to save the key (/c/Users/USERNAME/.ssh/id_rsa):.- If you have already created a key here, it will ask you if you would like to overwrite the file. Type
yand pressEnter.
- If you have already created a key here, it will ask you if you would like to overwrite the file. Type
-
Enter a password that you will remember for your SSH key. It will not appear as you type it, so make sure you get it right the first time. Press
Enterafter typing the password that you come up with. -
After seeing the randomart image associated with your SSH, you should be able to type a new command. Type
cat ~/.ssh/id_rsa.puband pressEnter. Your key will appear— remember that this should not be shared with others. The key begins withssh-rsaand it may end with your username. Copy this entire key by clicking and dragging over it, right-clicking, and clickingCopy. -
Return to your web browser which is on the GitHub SSH key settings page. Click the green button that reads
New SSH Keyand type a Title for this key. You should name it something memorable and distinct; for example, if you just generated the key on your desktop computer, a suitable name isDesktop. If generated on your laptop, name itLaptop, or if you have numerous laptops, differentiate them with distinct names, and so on.- If you only have one computer and you have preexisting keys on this page, maybe some which you do not remember the password to or have fallen out of use, consider deleting them (as long as you are sure this will not break anything).
-
Paste the key into the key box. You should have copied it from Git Bash in Step #5. Then, click the green button that reads
Add SSH key. Congratulations— you have successfully configured your SSH key.
Using the ssh key
Now we will try cloning a repository. We use as an example a repository that we created for a student from a REU. Your example may be different. please adjust the repository name. Your repository will have a format of xxxx-reu-xxx
-
Navigate to your repository and
cdinto it. (In case of the REU we recommend to place it into a directory calledcybertraining-dsc.$ mkdir ~/Descktop/cybertraining-dsc $ cd cybertraining-dsc $ git clone git@github.com:cybertraining-dsc/YOURREPONAME.gitand replace YOURREPONAME with the name of your repository
-
Alternatively you can download it via the GitHub Web GUI. Once you are on your repository page, click the green button that reads
Codewith a download symbol. Click theSSHoption and click on the clipboard next to the link so that you copy it. It should sayCopied!after you click on it. -
Decide where you want your repository folder to be stored. This tutorial will clone the repo into the Documents folder. Go back to Git Bash and type
cd ~/Desktop/cybertraining-dscand pressEnter. It is a good idea to create a folder titledreufor organization. Typemkdir reuand pressEnter. Typecd reuand pressEnter. Finally, typegit clone, and after you put a space after clone, paste the copied link from GitHub. For example, your command should look similar to this:git clone git@github.com:cybertraining-dsc/su21-reu-361.gitThen, pressEnter.- The shortcut
Ctrl + Vdoes not work in Git Bash for pasting. Instead, you can pressShift + Insertto paste.
- The shortcut
-
Type in your password for your SSH key and press
Enter. The repo should clone with no issue. You can now typecode .and pressEnterto open VSCode in this directory. ClickYes, I trust the authorsif prompted in VSCode. If you use PyCharm instead of VSCode, you can open it from Windows search; inside of PyCharm, clickFile,Open...and then navigate toC:,Users, your username,Documents, and then click onreuso it is highlighted in blue and then clickOK. If PyCharm asks, you can choose to open it inThis Windowor aNew Window.
Using ssh-agent and ssh-add
If you do not want to always type in your password you can prior to the first commit in the termnal in which you issue the commits say
$ eval `ssh-agent`
$ ssh-add
2.3 - GitHub gh Command Line Interface
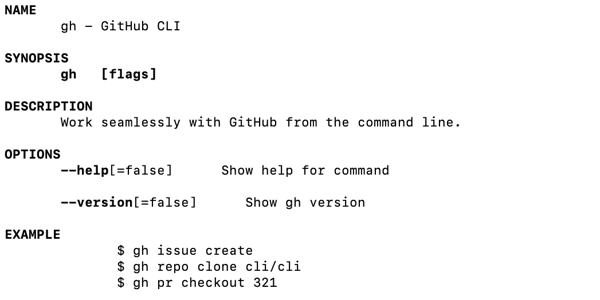
Figure 1: GitHub Command gh.
GitHub provides an extended gh commandline tool that allow easy interaction of forking repositories directly from github. IT also provides additional fimctionality to interact with other advanced features that are typically not provided in the git command tool.
Learning Objectives
- Learn how to install the gh command
- Learn how to use the gh command
Topics covered
1. Introduction
The new GitHub gh command allows GitHub users to work from the terminal of
their machine without having to visit the web browser GUI to manage things like
issues, PRs, and forking. We will show you what features it provides and how to
use it. The gh command provides useful features that is not provided by the `git
commandline tool.
2. Installing GitHub gh command
Visit the GitHub CLI homepage at https://cli.github.com/ for installation instructions. We recommend that you check out the source distribution because We found that whne we did this tutorial not all features were included in the brew instalation. We assume ths will cahnge over time and you may soon be able to just use the bre install on LInux and MacOs.
On mac, you can use the following command with Brew:
brew install gh
For Windows useser, please follow the install instructions fro Winodws.
3. Logging in with GitHub gh Command
It is best practice to be using SSH-keys with GitHub. Create one if you have not already with the following command:
ssh-keygen
We recommend t use the the default location.
To authenticate with the GitHub gh comamand, run the following command. We have included
the answers to the interactive prompts used for this guide.
gh auth login

What account do you want to log into? GitHub.com
? What account do you want to log into? GitHub.com
? What is your preferred protocol for Git operations? SSH
? Upload your SSH public key to your GitHub account? ~/.ssh/id_rsa.pub
? How would you like to authenticate GitHub CLI? Login with a web browser

! First copy your one-time code: 1234-1A11
- Press Enter to open github.com in your browser...
3.1 Adding Additional Keys
IN acse you work with multiple computers it is advisable to add your keys from these machines also. We demonstarte the interaction to upload the key from a new machine.
newmachine$ gh ssh-key add ~/.ssh/id_rsa.pub
Error: insufficient OAuth scopes to list SSH keys
Run the following to grant scopes: gh auth refresh -s write:public_key
newmachine$ gh auth refresh -s write:public_key

! First copy your one-time code: 4C2D-E896
- Press Enter to open github.com in your browser...
✓ Authentication complete. Press Enter to continue...

newmachine$ gh ssh-key add ~/.ssh/id_rsa.pub
✓ Public key added to your account
4. Forking
We can easily create a fork of a repo with the following:
gh repo fork
This is useful for when you do not have write access to the original repository.
5. Pull Requests
We can create a pull request easily as follows from a git repo:
gh pr create
The command above will ask the user where to push the branch (if it does not already exist on the remote). It will also offer the option to fork the initial repository. You will want to do this if you do not have write access to the original repo.
Once created, you may view the status of the PR with the following:
gh pr status
Reviewers can checkout your pull request to verify changes as follows:
gh pr checkout {PR NUMBER}
The reviewer can then approve the PR as follows:
gh pr review --approve
Subsequently, the PR can be merged as follows:
gh pr merge {PR NUMBER}
You may also list all pull requests with the following:
gh pr list
Finally, PRs can be closed with
gh pr close {PR NUMBER}
6. Managing Issues with GitHub gh Command
To create an issue, call the following:
gh issue create --title="Bug 1" --body="description"
We can also check the status of issues relevant to use with:
gh issue status
Alternatively, we may list all open issues.
gh issue list
Finally, we may close issues with:
gh issue close {ISSUE NUMBER}
7. Manual Pages
7.1 gh
gh(1)                                                                    gh(1)

NAME
       gh - GitHub CLI

SYNOPSIS
       gh   [flags]

DESCRIPTION
       Work seamlessly with GitHub from the command line.

OPTIONS
       --help[=false]      Show help for command

       --version[=false]      Show gh version

EXAMPLE
              $ gh issue create
              $ gh repo clone cli/cli
              $ gh pr checkout 321

SEE ALSO
       gh-alias(1),  gh-api(1),  gh-auth(1),  gh-completion(1),  gh-config(1),
       gh-gist(1),   gh-issue(1),   gh-pr(1),    gh-release(1),    gh-repo(1),
       gh-secret(1), gh-ssh-key(1)
7.2 List of Man Pages
Tha manual pages are published at the gh manual. For mor information you can also use the man command. A full list of manual pages includes:
- gh
- gh-alias-delete
- gh-alias-list
- gh-alias-set
- gh-alias
- gh-api
- gh-auth-login
- gh-auth-logout
- gh-auth-refresh
- gh-auth-status
- gh-auth
- gh-completion
- gh-config-get
- gh-config-set
- gh-config
- gh-gist-clone
- gh-gist-create
- gh-gist-delete
- gh-gist-edit
- gh-gist-list
- gh-gist-view
- gh-gist
- gh-issue-close
- gh-issue-comment
- gh-issue-create
- gh-issue-delete
- gh-issue-edit
- gh-issue-list
- gh-issue-reopen
- gh-issue-status
- gh-issue-view
- gh-issue
- gh-pr-checkout
- gh-pr-checks
- gh-pr-close
- gh-pr-comment
- gh-pr-create
- gh-pr-diff
- gh-pr-edit
- gh-pr-list
- gh-pr-merge
- gh-pr-ready
- gh-pr-reopen
- gh-pr-review
- gh-pr-status
- gh-pr-view
- gh-pr
- gh-release-create
- gh-release-delete
- gh-release-download
- gh-release-list
- gh-release-upload
- gh-release-view
- gh-release
- gh-repo-clone
- gh-repo-create
- gh-repo-fork
- gh-repo-view
- gh-repo
- gh-secret-list
- gh-secret-remove
- gh-secret-set
- gh-secret
- gh-ssh-key-add
- gh-ssh-key-list
- gh-ssh-key
7. Conclusion
There are many other commands for the GitHub CLI that can be found in the gh manual, however we only include a select number of relevant commands for this guide. The commands mentioned above serve to familiarize the user with the GitHub CLI while also providing practical usage.
2.4 - GitHub hid Repository
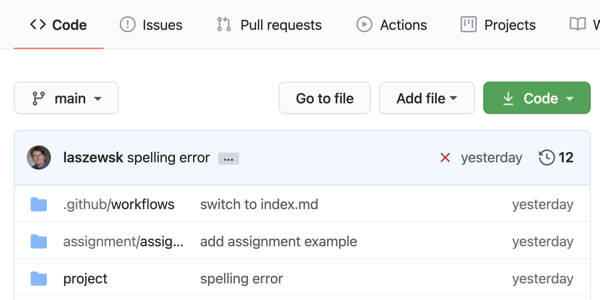
Figure 1: GitHub hid directory.
To contribute to our open source projects we provide you with a Git repository in which you conduct your activities.
Learning Objectives
- Learn how to cone the repo
- Learn how to use the rego
- Learn how to commit and push changes to GitHub
Topics covered
1. Introduction
As part of our open source activities, you will be given a GitHub repository. To contribute to our open source projects we provide you with a Git repository in which you conduct your activities.
We will explain how you use them from the command line.
2. Prerequisites
- On macOS we assume you have x-code installed which comes with the git command
- line tools On Windows we assume you have gitbash installed and use git
- through gitbash. Alternatively, you can use multipass, or WSL2 On Linux, make
- sure you have the git command line tools installed.
3. Setting up the ssh-key
In case you have not yet set up an ssh key, you can do this with the command.
$ ssh-keygen
YOu will be asked for the default location, accept it. After that, you will be asked for a passphrase. Please choose one and make sure you do not make it empty. Often you find wrong tutorials or guidance by others that say you can leave it empty. DO NOT FOLLOW THEIR WRONG ADVICE.
Upload the content of the file
$ cat ~/.ssh/id_rsa.pub
Into the GitHub portal at https://github.com/settings/keys.
You will then use the SSH key to authenticate to GitHub.
To not always have to type in the password you can use ssh-keychain.
On Mac OS you can simply use the command
$ ssh-add
and enter your password
4. Simplify the Tutorial while using Shell Variables
To simplify the tutorial we use from here on two shell variables. The first is
HID which specifies the name of your GitHub repository as found in
In our case, we use hid-example. The second variable is the name/path of the
editor in which we edit commit messages for git.
$ export HID=hid-example
$ export EDITOR=emacs
5. Cloning the Repository
Let us now clone the repository, change int the checked out repository and edit the project file.
$ git clone git@github.com:cybertraining-dsc/$HID.git
$ cd $HID/project
$ $EDITOR index.md
Now let us make a modification and save the file locally.
6. Commit Changes Locally
To commit the changes locally, you use the following command. Make sure to put a commit message and specify the filename.
$ git commit -m "Improved document with this and that" index.md
7. Adding Files
To add new files you can simply use the add command and use the commit command after it.
$ git add image/newimage.png
$ git commit -m "Improved document with this and that" image/newimage.png
8. Push the commits to GitHub
GitHub as you know is a service that stores your files once you push them from your local commits to GitHub. To push the commits use the command
$ git push
8. Pulling Changes
GitHub shines when you work with multiple people together on your projects. This may be project partners or feedbacks that are placed in your documents by us. Thus, it is important that you state in synchronization with the files in GitHub. Do this use the command
$ git pull
in any directory of the repository that you have checked out. It will update any file that has changed. In case of a conflict, your file will include a text such as
<<<<<<< HEAD
This is the new text from you
=======
This is the text in the repo
>>>>>>>
You will have to remove the text between the «< and »> and replace it with the text that is correct. In the simplest case, one of the choices will be correct. However, you may have in some cases to merge the two versions.
It is important to pull frequently. It is also important to not just paste and copy the entire file, but use the command line tools and editor to conduct the change as not to overwrite other changes.
7. Conclusion
The use of git from the command line is straightforward for existing
repositories. It is easy to do. Make sure to create an ssh-key and start in
synchronization with frequent pulls.
3 - REU Tutorials
3.1 - Installing PyCharm Professional for Free
Abstract
This tutorial teaches how to get PyCharm Professional for free on Windows 10 using a university email address. You can follow a similar process on Linux and macOS.
Contents
Keywords: pycharm
Steps
Click the following image to be redirected to a YouTube video tutorial for installing PyCharm Professional.
Please ensure that you qualify. This includes you having a valid educational email or be part of an open-source project. Make sure to explore the license agreements for PyCharm as they may change.
-
Open up a web browser and search
pycharm. Look under the link fromjetbrains.comand clickDownload PyCharm. -
Click the blue button that reads
Downloadunder Professional. Wait for the download to complete. -
Open the completely downloaded file and click
Yeson the UAC prompt.- If you have a school computer, please refer to the note under step 5 of the Windows section in the Python tutorial found here: https://github.com/cybertraining-dsc/cybertraining-dsc.github.io/blob/main/content/en/docs/tutorial/reu/python/index.md
-
Click
Next, clickNextagain, and check the box that readsAdd launchers dir to the PATH. You can also create a Desktop Shortcut and create the.pyassociation if you would like. The association changes which program, by default, opens.pyfiles on your computer. -
Click
Nextand then clickInstall. Wait for the green progress bar to complete. Then, you must restart your computer after making sure all of your programs are saved and closed. -
Open PyCharm either by clicking on the Desktop shortcut you might have made or hit the Windows key and type
PyCharmand choose the program from the search results. -
Check the box that says
I confirm that I have read and accept the terms...after agreeing to the terms. -
Click
Continue. You can choose to send anonymous statistics, if you want to; click the option you want. -
Click the hyperlink that says
Buy licensein the top right of the window. Do not worry — you will not be spending a cent. -
Click the person icon in the top right of the page (if you cannot find this person icon, then click this link and hopefully, it still works: https://account.jetbrains.com/login ).
-
Create a JetBrains account by entering your university email address. Click
Sign Upafter entering your email; then, you have to go on your email and confirm your account in the automated email sent to you. ClickConfirm your accountin the email. -
Complete the registration form and click
Submit. -
Click
Apply for a free student or teacher license. Scroll down and click the blue button that readsApply now. -
Fill out the form using your (educational) email address and real name. Check the boxes if they apply to you. Then click
APPLY FOR FREE PRODUCTS. -
JetBrains should send you an automated email, ideally informing you that your information has been confirmed and you have been granted a free license. If it does not arrive immediately, wait a few minutes. Go back to PyCharm and sign in with your JetBrains account after receiving this email. Click
Activate. Now you can use PyCharm.
3.2 - Installing Git Bash on Windows 10
Abstract
This tutorial teaches how to install Git and Git Bash.
Contents
Keywords: git
Windows
Click the following image to be redirected to a YouTube video tutorial for installing Git and Git Bash. This same video also includes instructions to create a virtual Python environment, which you can do as well.
To verify whether you have Git, you can press Win + R on your desktop, type cmd, and press Enter. Then type git clone and press Enter. If you do not have Git installed, it will say 'git' is not recognized as an internal or external command...
As long as Git does not change up their website and hyperlinks, you should be able to download Git from here and skip to step 2: https://git-scm.com/downloads
-
Open a web browser and search
git. Look for the result that is fromgit-scm.comand click Downloads. -
Click
Download for Windows. The download will commence. Please open the file once it is finished downloading. -
The UAC Prompt will appear. Click
Yesbecause Git is a safe program. It will show you Git’s license: a GNU General Public License. ClickNext.- The GNU General Public License means that the program is open-source (free of charge).
-
Click
Nextto confirm thatC:\Program Files\Gitis the directory where you want Git to be installed. -
Click
Nextunless you would like an icon for Git on the desktop (in which case you can check the box and then clickNext). -
You will be asked several questions for the setup. We recommend the following settings:
- Click
Nextto accept the text editor, - Click
Nextagain to Let Git decide the default branch name - Click
Nextagain to run Git from the command line and 3rd party software, - Click
Nextagain to use the OpenSSL library - Click
Nextagain to checkout Windows-style, - Click
Nextagain to use MinTTY, - Click
Nextagain to use the default git pull, - Click
Nextagain to use the Git Credential Manager Core, - Click
Nextagain to enable file system caching, and then - Click
Installbecause we do not need experimental features.
- Click
-
The progress bar should not take too long to finish. To test if it is installed, you can search for
Git Bashin the Windows search now to run it.
3.3 - Using Raw Images in GitHub and Hugo in Compatible Fashion
This tutorial teaches how to add images on GitHub and use them in your markdown file that can be rendered in Hugo and markdownon GitHub.
Contents
Keywords: github
Steps
-
Upload your image to GitHub in the images directory
-
Click on the image file and then right click on it and click
Open image in new tab -
Use the URL shown in the address bar of the new tab to paste into the markdown file.
-
When using the file, please add a caption; also, if it is copied, make the citation which should point to the reference section

**Figure 2:** Sample Database file obtained from the USGS
water-quality database for the year 2017 [^1]
## Refernces
[^1]: HERE COMES THE CITATION OF THE IMAGE
3.4 - Using Raw Images in GitHub and Hugo in Compatible Fashion
This tutorial teaches how to add images on GitHub and use them in your markdown file that can be rendered in Hugo and markdownon GitHub.
Contents
Keywords: github
How to use images is clearly shown in our template at
https://github.com/cybertraining-dsc/hid-example/blob/main/project/index.md
3.5 - Uploading Files to Google Colab
Abstract
This tutorial teaches how to import CSV’s into a Google Colab .ipynb.
Contents
Keywords: colab
Note
There are two different methods of uploading files to Google Colab Jupyter notebooks. One way is to have the user upload the file to the user’s Google Drive before running the notebook. Another way is to have the notebook ask the user to upload a file directly into the notebook from the user’s computer. This tutorial outlines both ways.
The notebook code with both methods can be found here
Read File from Drive
This code will read a CSV file using pandas. Before running it, the user
must upload the CSV file to the Google Drive of the same Google account on which it runs the notebook in Colab (e.g., your account). The
CSV file in this example is titled kag_risk_factors_cervical_cancer but please rename it accordingly to match the file
you would like to upload.
Cell 1:
import pandas as pd
from google.colab import drive
drive.mount("/content/gdrive", force_remount=True)
# The next line of code will tell Colab to read kag_risk_factors_cervical_cancer.csv in your Drive (not in any subfolders)
# so you should alter the code to match whichever .csv you would like to upload.
df=pd.read_csv('gdrive/My Drive/kag_risk_factors_cervical_cancer.csv')
# The next two lines of code convert question marks to NaN and converts values to numeric type, consider
# removing the next two lines if not necessary.
df = df.replace('?', np.nan)
df=df.apply(pd.to_numeric)
# If this cell successfully runs then it should output the first five rows, as requested in the next line of code
df.head(5)
Colab will ask you to click on a blue link and sign in with your account. Once done, the user must copy a code
and paste it into the box on Colab for authentication purposes. Press Enter after pasting it into the box.
If it outputs an error along the lines of unknown directory, try rerunning the two cells and ensuring that
your CSV is not in any folders inside Google drive. You can also alter the code to point it to a subdirectory if needed.
Read File from Direct Upload
To read it with built-in Colab methods, you can use the following code:
Cell 1:
from google.colab import files
df = files.upload()
The user will be prompted to click Browse... and to find the file on the user’s local
computer to upload. Sometimes trying to upload the file will give this error:
MessageError: RangeError: Maximum call stack size exceeded.
In this case, the user should click the folder icon on the left side of Google Colab window, then the paper with an arrow icon (to upload a file), then upload the CSV you wish to use. Then rerunning Cell 1 is not necessary. Simply proceed to Cell 2. If this still does not work, see this stackoverflow page for further information.
Cell 2:
df=pd.read_csv('kag_risk_factors_cervical_cancer.csv')
# The next two lines of code convert question marks to NaN and converts values to numeric type, consider
# removing the next two lines if not necessary.
df = df.replace('?', np.nan)
df=df.apply(pd.to_numeric)
# If this cell successfully runs then it should output the first five rows, as requested in the next line of code
df.head(5)
Remember to rename the instances of kag_risk_factors_cervical_cancer.csv accordingly so that it matches your file name.
Acknowledgments
Credit to Carlos who provided the cell to upload the file directly.
3.6 - Adding SSH Keys for a GitHub Repository
This tutorial teaches how to configure an SSH Key on GitHub so that you can clone, commit, pull, and push to repositories (repos).
Contents
Keywords: ssh
Windows
Please ensure that you have Git (Git Bash) and a repository on GitHub. This tutorial was created with the REU program in mind, where the students are provided with a GitHub repository. If you are not in REU, then you can create a new repository on GitHub and clone that instead.
-
Open Git Bash by pressing the Windows key, typing
git bash, and pressing Enter. -
Then, go on GitHub, click on your profile icon in the top right, click
Settings, and clickSSH and GPG keyson the left hand side. Confirm that there are no SSH keys associated with your account. If there are keys, then perhaps you have made some already. This tutorial focuses on creating a new one. -
Go back to Git Bash and type
ssh-keygen. PressEnter. PressEnteragain when it asks you the file in which to save the key (it should sayEnter file in which to save the key (/c/Users/USERNAME/.ssh/id_rsa):.- If you have already created a key here, it will ask you if you would like to overwrite the file. Type
yand pressEnter.
- If you have already created a key here, it will ask you if you would like to overwrite the file. Type
-
Enter a password that you will remember for your SSH key. It will not appear as you type it, so make sure you get it right the first time. Press
Enterafter typing the password that you come up with. -
After seeing the randomart image associated with your SSH, you should be able to type a new command. Type
cat ~/.ssh/id_rsa.puband pressEnter. Your key will appear— remember that this should not be shared with others. The key begins withssh-rsaand it may end with your username. Copy this entire key by clicking and dragging over it, right-clicking, and clickingCopy. -
Return to your web browser which is on the GitHub SSH key settings page. Click the green button that reads
New SSH Keyand type a Title for this key. You should name it something memorable and distinct; for example, if you just generated the key on your desktop computer, a suitable name isDesktop. If generated on your laptop, name itLaptop, or if you have numerous laptops, differentiate them with distinct names, and so on.- If you only have one computer and you have preexisting keys on this page, maybe some which you do not remember the password to or have fallen out of use, consider deleting them (as long as you are sure this will not break anything).
-
Paste the key into the key box. You should have copied it from Git Bash in Step #5. Then, click the green button that reads
Add SSH key. Congratulations— you have successfully configured your SSH key. Now we will try cloning your REU repository. -
Navigate to your repository. It should be in the cybertraining-dsc directory with a name format of
xxxx-reu-xxx. Once you are on that page, click the green button that readsCodewith a download symbol. Click theSSHoption and click on the clipboard next to the link so that you copy it. It should sayCopied!after you click on it. -
Decide where you want your repository folder to be stored. This tutorial will clone the repo into the Documents folder. Go back to Git Bash and type
cd ~/Documentsand pressEnter. It is a good idea to create a folder titledreufor organization. Typemkdir reuand pressEnter. Typecd reuand pressEnter. Finally, typegit clone, and after you put a space after clone, paste the copied link from GitHub. For example, your command should look similar to this:git clone git@github.com:cybertraining-dsc/su21-reu-361.gitThen, pressEnter.- The shortcut
Ctrl + Vdoes not work in Git Bash for pasting. Instead, you can pressShift + Insertto paste.
- The shortcut
-
Type in your password for your SSH key and press
Enter. The repo should clone with no issue. You can now typecode .and pressEnterto open VSCode in this directory. ClickYes, I trust the authorsif prompted in VSCode. If you use PyCharm instead of VSCode, you can open it from Windows search; inside of PyCharm, clickFile,Open...and then navigate toC:,Users, your username,Documents, and then click onreuso it is highlighted in blue and then clickOK. If PyCharm asks, you can choose to open it inThis Windowor aNew Window.
3.7 - Installing Python
Abstract
This tutorial teaches how to install Python on Windows 10. It can be similarly installed also on macOS and Linux.
Contents
Keywords: python
Windows
Click the following image to be redirected to a 2-minute YouTube walkthrough.
-
First, open the url https://www.python.org/downloads/ in any web browser.
-
As of June 2021, the latest version of Python is
3.9.6. You may see a different number. We recommend you use the newest official version which is provided to you by simply clicking the button under “Download the latest version for Windows”. -
Once the download has completed, open the file by clicking on it in your Downloads pane.
-
Be sure to check the box that reads “Add Python x.x to PATH”. This will allow you to run commands from the terminal/command prompt.
-
Click “Install Now”. The default options that entail this selection are appropriate.
- The UAC prompt will pop up. UAC stands for “User Account Control” and exists so that the computer will not have unauthorized changes performed on it. Click “Yes” because Python is safe. School-issued computers may ask for an administrator password, so contact your IT department or professor.
-
The installation will take some time.
-
If the setup was successful, then it will say so. Click “Close”.
-
Click the “Type here to search” box in the bottom-left of the screen, type “cmd”, and press Enter.
- An alternative method is to press the Windows key and the “R” key at the same time, type “cmd”, and press Enter. This is convenient for those who like to use the keyboard.
-
Type
python --versionand the output should read “Python x.x.x”; as long as it is the latest version from the website, congratulations. Python is installed on the computer.
Mac
Click the following image to be redirected to a 5-minute YouTube walkthrough. (Yes, Mac’s video is a little longer, but do not fret! You can skip to the 1:00 minute mark if you are in a hurry.)
-
First, open the url https://www.python.org/downloads/ in any web browser.
-
Underneath
Download the latest version for Mac OS X, there should be a yellow button that readsDownload Python x.x.x. Click on it, and the download should commence. -
Once the download finishes, open it by clicking on it. The installer will open. Click
Continue, clickContinueagain, and clickContinueagain. Read the agreements. -
Click
Agree.- If you want to check how much free storage you have on your computer, click the Apple icon in the top left of your computer. Click
About This Macand then click onStorage. As of July 2021, Python takes ~120 MB of space. Remember that 1 GB = 1000 MB.
- If you want to check how much free storage you have on your computer, click the Apple icon in the top left of your computer. Click
-
Click
Install. Enter your password and press Enter. The installation will take a while. -
A Finder window will open. You can close it as it is unnecessary. Click
Closein the bottom-right of the installer. ClickMove to Trashbecause you do not need the installer anymore. -
Next confirm that Python installed correctly. Click the magnifying glass in the top-right of your screen and then type
terminalinto Spotlight Search. Double-clickTerminal.- The terminal will be used frequently. Consider keeping it in the dock for convenience. Click and hold the Terminal in the dock, go to
Options, and clickKeep in Dock.
- The terminal will be used frequently. Consider keeping it in the dock for convenience. Click and hold the Terminal in the dock, go to
-
Type
python3 --versioninto the terminal and press Enter. It should output the latest version of Python. Congratulations!
Linux
Click the following image to be redirected to a 9-minute YouTube walkthrough. (Linux’s tutorial is the longest, but it is worth it.) This tutorial uses Ubuntu, but it should work on other Linux distros, as well.
- Naturally we recommend that you read all of the licensing information.
-
First, open the url https://www.python.org/downloads/ in any web browser.
-
Look at the latest version. It is on the yellow button:
Download Python x.x.x. You do not need to click this button. Remember this version number. -
Open a terminal by pressing the Windows key or by clicking the grid on the bottom left of your screen. Type
terminal. Click on theTerminalresult that appears. -
Next, prepare your system:
Note: If you want to check how much disk space you have, you can use
$ df -h /
Filesystem       Size   Used  Avail Capacity iused       ifree %iused  Mounted on
/dev/disk1s5s1  1.8Ti   14Gi  387Gi     4%  553757 19538475003    0%   /
The value under Avail will be your available space. Make sure you have sufficient space.
$ sudo apt-get update
$ sudo apt install -y wget curl
$ sudo apt install -y openssl libssl-dev
$ sudo apt install -y build-essential zlib1g-dev libncurses5-dev
$ sudo apt install -y libgdbm-dev libnss3-dev  libreadline-dev libffi-dev libsqlite3-dev libbz2-dev
-
After this finishes, type
cd /optand press Enter. Then, remember which version you read on the Python webpage (the latest version) and add it as environment variablePVto your terminal so we can more easily execute commands that include the version number. Type:$ PV=3.9.6 $ sudo wget https://www.python.org/ftp/python/$PV/Python-$PV.tgz $ sudo tar xzvf Python-$PV.tgz $ cd Python-$PV $ ./configure --enable-optimizations $ make $ sudo make altinstall -
Confirm Python’s successful installation by typing
pythonx.x --version; be sure to replace x.x with the first two numbers of the version number. It should output the latest version number. Congratulations!
Python venv
Before you install packages, you need to create a Python venv in your local environment. We typically do this with
$ python3.9 -m venv ~/ENV3
$ source ~/ENV3/bin/activate
or for Windows executed in git bash
$ python -m venv ~/ENV3
$ source ~/ENV3/Scripts/activate
Troubleshooting
Incorrect Python Version on Command Prompt (Windows)
If the Windows computer has previously installed an older version of Python, running python --version on Command Prompt may output the previously installed older version. Typing python3 --version may output the correct, latest version.
3.8 - Installing Visual Studio Code
Abstract
This tutorial teaches how to install Visual Studio Code on Windows 10.
Contents
Keywords: visual-studio-code
Steps
Click the following image to be redirected to a YouTube video tutorial for installing Visual Studio Code (also called VSCode).
Sidenote: An exasperated reader may wonder, “why go through steps 1-3 when it can be as easy as clicking a link to the VSCode download page?” This would be easier, but hyperlinks (or URLs) are bound to change through the years of website maintenance and alterations. (One could also argue that steps 1-3 could become incorrect, as well, but hopefully they will not.) If you, time-traveler, would like to try your luck, go here: https://code.visualstudio.com/download
If the link works, skip to step 4.
P.S. It should be second-nature to a user to quickly search, find, download, and install a program. It is vital to ensure that the correct program is downloaded and installed, however. Over time, guides like this one can become deprecated, but one must be resilient in problem-solving. Use search engines like Google to find what you are looking for. If one path does not work, take another that will lead to the same destination or a better one.
-
Open up your favorite web browser. This can be done by pressing the Windows key and typing in the name of the browser, like
google chrome(as long as this browser is already installed on your computer). Then press Enter. -
Once the browser loads, search for
visual studio codethrough the address bar. Press Enter and you will see a list of results through the default search engine (Google, Bing, or whatever is configured on your browser). -
Identify the result that reads
code.visualstudio.com. If using Google, a subresult should readDownload. Click that link. -
This tutorial assumes that the reader is using Windows. Click the blue link that reads
Windows. The download will commence; wait for it to finish. -
Click and open the file once it finishes; the license agreement will appear. If you are proficient in legalese, you can read the wall of text. Then, click
I accept the agreementand clickNext. -
Click
Nextagain; it is best to leave the default install path alone for reproducibility in this experiment. -
Click
Nextagain to create a Start Menu folder. Ensure thatAdd to PATHis checked.Create a desktop iconcan be checked for convenience; it is up to the reader’s choice. Then clickNext. -
Click Install and watch the green progress bar go at the speed of light. Once completed, click Finish. VSCode will open as long as everything went smoothly.
4 - Tutorial on Using venv in PyCharm
Jacques Fleischer
Abstract
This tutorial teaches how to set PyCharm to use a venv.
Contents
Keywords: venv
Windows
Please ensure that you have Git (Git Bash), Python, and PyCharm. If you do not have those, look for the tutorials to install them.
This tutorial was created with the REU program in mind, where the students are provided with a GitHub repository. If you are not in REU, then you can create a new repository on GitHub and clone that instead.
Click the following image to be redirected to a YouTube video tutorial for setting venv in PyCharm. Please keep in mind that this video follows directions that are somewhat different from the written instructions below. REU students should follow the written instructions over the video. Otherwise, in the video, you should skip to timestamp 8:19 unless you do not have Git or a venv, in which case you should watch the entire video.
-
If you have not already cloned your reu repository, you need to follow a separate tutorial which involves setting up your SSH key on GitHub, which can be found here.
-
Open PyCharm. If this is your first time opening PyCharm, then it will say
Welcome to PyCharm. You should have cloned your repo to a particular location on your computer; clickOpenand then locate your reu folder. Once you have found it, click on it so it is highlighted in blue and then clickOK. Alternatively, if you have used PyCharm before, your previous project should open, in which case you should clickFileandOpen...to open your repo (if it is not already open). -
Please ensure that you have already configured a venv through Git Bash. If you have not, then read and follow this tutorial.
-
In the top-right of PyCharm, click on the button that reads
Add Configuration.... ClickAdd new...on the left underneathNo run configurations added.and then scroll and clickPython. Give this a name; you can just typePython venv. Next toPython interpreter, choosePython x.x (ENV3). Thex.xwill depend on which version of Python you have. Then clickOK.- The button might not read
Add Configuration.... If you have configured a run configuration previously, then you can create a new one. Click the button right next to the green play button in the top-right of PyCharm. Then, it should sayEdit Configurations...which you must click on. Change the Python interpreter to be theENV3one, as outlined in Step #4.
- The button might not read
-
You also have to click
Python x.xin the bottom-right of PyCharm, next tomain. From there, choosePython x.x (ENV3). To verify that your virtual environment is working, click onTerminalin the bottom-left of PyCharm. Click the+(plus) icon next to Local to start a new terminal. It should say(ENV3)next to your current working directory. Congratulations!
5 - 10 minus 4 Monitoring Tools for your Nvidia GPUs on Ubuntu 20.04 LTS
Please use this link for an up to date story: medium.com
1. Introduction
So you have installed your long-awaited graphics card from NVIDIA and like to observe its utilization. You may be familiar with nvidia-smi, but there is more to this tool as you may know. We will provide you with some examples of what you can do with it. Furthermore, we will showcase several tools that allow you to monitor the card(s) as they provide more sophisticated visualizations. We present graphics and terminal commands. The reason why terminal commands are so popular is that they can be called in containers, but also through simple remote shell invocations where it may be inconvenient to use a GUI.
Although we started with the hope that all of them are easy to install, we found out that only five of the 10 did install without issues. We found especially a lack of documentation on the other tools to make them work. Naturally, we have other things to do as likely you, so we did not spend any time trying to fix the things. Instead, we moved on and looked at other tools that are easier to install and work.
We hope with our review we safe you time.
2. Preface
-
Notation: We use in the document some commands issued on the terminal, and prepend them with a ‘$’ to easily distinguish them from other text.
-
Operating system: We restricted this review to tools that are available on Ubuntu as this is what we use to interact with the cards. Several tools also exist for windows, but this may be a topic for another day.
3. Python3 venv
Some of the tools come as python packages and in order not to effect your default python installation we recommend using a python virtual environment. We use in our virtual environment python 3.9. To do so make sure you have python 3.9 installed, which you can obtain in various ways.
Then create and source it and you should be ready to go after you execute the following commands:
$ python3 -m venv ~/ENV3
$ source ~/ENV3/bin/activate
$ pip install pip -U
To permanently add it to your startup, please add the line:
source ~/ENV3/bin/activate
to your .bash_profile file
4. The tools to monitor your NVIDIA Cards
4.1 nvidia-smi
After you installed the Nvidia drivers and programs you will find a
program called nvidia-smi. You simply can call it with
$ nvidia-smi
This gives you the current status of the cards.
+-----------------------------------------------------------------------------+
| NVIDIA-SMI 460.73.01    Driver Version: 460.73.01    CUDA Version: 11.2     |
|-------------------------------+----------------------+----------------------+
| GPU  Name        Persistence-M| Bus-Id        Disp.A | Volatile Uncorr. ECC |
| Fan  Temp  Perf  Pwr:Usage/Cap|         Memory-Usage | GPU-Util  Compute M. |
|                               |                      |               MIG M. |
|===============================+======================+======================|
|   0  GeForce RTX 3090    On   | 00000000:0B:00.0  On |                  N/A |
| 32%   27C    P8    15W / 350W |    618MiB / 24234MiB |      1%      Default |
|                               |                      |                  N/A |
+-------------------------------+----------------------+----------------------+

+-----------------------------------------------------------------------------+
| Processes:                                                                  |
|  GPU   GI   CI        PID   Type   Process name                  GPU Memory |
|        ID   ID                                                   Usage      |
|=============================================================================|
|    0   N/A  N/A      1544      G   /usr/lib/xorg/Xorg                102MiB |
|    0   N/A  N/A      2663      G   /usr/lib/xorg/Xorg                387MiB |
|    0   N/A  N/A      2797      G   /usr/bin/gnome-shell               89MiB |
|    0   N/A  N/A      4866      G   /usr/lib/firefox/firefox            4MiB |
|    0   N/A  N/A      7884      G   /usr/lib/firefox/firefox            4MiB |
|    0   N/A  N/A      8939      G   /usr/lib/firefox/firefox            4MiB |
|    0   N/A  N/A     10674      G   /usr/lib/firefox/firefox            4MiB |
|    0   N/A  N/A     11148      G   /usr/lib/firefox/firefox            4MiB |
+-----------------------------------------------------------------------------+
To get a repeated update you can use the command
$ nvidia-smi -l 1
where the parameter after the -l specifies the time in seconds between
updates. However it to avoid past traces to be showing up in your
command history, you can also use
$ watch -n 1 nvidia-smi
which we prefer. Unkown to some users I spoke to they did not know that this command comes with a lot of features you can access from the command line to customize your query. To find out more about it use the commands
$ nvidia-smi --help-query-compute-apps
and
$ nvidia-smi --help
to get inspired. Here is for example a command that returns the content of a specific query of selected attributes in csv format for further processing.
Examples are:
$nvidia-smi --query-gpu=timestamp,temperature.gpu --format=csv
timestamp, temperature.gpu
2021/05/30 10:39:37.436, 26
$ nvidia-smi --query-gpu=name,index,temperature.gpu,utilization.gpu,utilization.memory,memory.total,memory.free,memory.used --format=csv,noheader,nounits
GeForce RTX 3090, 0, 30, 0, 0, 24234, 23512, 722
4.2 gpustat
gpustat is a minimal terminal command that lists a subset of nvidia-smi.
It is easily installable with
$ pip install gpustat
you can call it repeatedly with
gpustat -cp --watch
or
watch -n 1 -c gpustat -cp --color
To see more options use
gpustat -h
The output looks similar to
hostname Sun May 30 12:29:59 2021  460.73.01
[0] GeForce RTX 3090 | 27'C,   1 % |   659 / 24234 MB | gdm(102M) username(413M) ...
4.3 nvtop
nvtop is a top-like task monitor for NVIDIA GPUs. It can handle multiple GPUs.
Nvtop could not be installed via pip install as it uses an outdated Nvidia library by default. Hence it is best to install it from the source as follows:
$ sudo apt-get install libncurses5-dev
$ git clone https://github.com/Syllo/nvtop.git
$ mkdir -p nvtop/build && cd nvtop/build
$ cmake ..
$ make
$ sudo make install
Now run it with
$ nvtop
The output looks like

Figure: Nvtop Screenshot
4.4 gmonitor
gmonitor is a simple GPU monitoring program for monitoring core usage, VRAM usage, PCI-E and memory bus usage, and the temperature of the GPU.
It is easy to install with
git clone https://github.com/mountassir/gmonitor.git
cd gmonitor/
mkdir build
cd build
cmake ..
make
sudo make install
you start it with
gmonitor
It looks as shown in the next figure.

Figure: gmonitor
4.5 glances
Glances is a top-like tool that reports on many different aspects of the system and not just GPUs. The tool is easy to install with
pip install py3nvml
sudo pip install glances[gpu]
You can start it with
$ glances
However, if you use a white background use
$ glances --theme-white

Note: All other tools listed here had installation issues. However, we did not spend time to debug them as any of the previous tools seem sufficient. However, some of the best looking GUI tools are in the list that did not install easily.
4.6 Install Issues: GreenWithEnvy
GreenWithEnvy is
a good looking application, however, also its install is not possible
on my system as it fails with an install issue of pycairo. The ode is
available on GitLab
Its instalation was only possible with fflatpack:
$ sudo apt install flatpak
$ flatpak --user remote-add --if-not-exists flathub https://flathub.org/repo/flathub.flatpakrepo
$ flatpak --user install flathub com.leinardi.gwe
$ flatpak update
Run it with
$ flatpak run com.leinardi.gwe


4.7 Install Issues: nvidia-system-monitor
As we have not installed qt we were suspicious about if this install would even work. Unfortunately, the documentation does not provide enough information on how to install qt. and make it work. The Web page for the tool is located at
It seems to be complex to install qt for free on a system, thus we have not followed up on this any further.
4.8 Install Issues: nvgpu
The Web page is located at Nvgpu
This module could not be easily installed even though we installed
sudo apt-get install liblzma-dev
sudo apt-get install liblzma
pip install -U nvgpu
nvgpu available
it returns
/home/USER/ENV3/lib/python3.9/site-packages/pandas/compat/__init__.py:97: UserWarning: Could not import the lzma module. Your installed Python is incomplete. Attempting to use lzma compression will result in a RuntimeError.
4.9 Install Issues: nvitop
nvitop is Aa interactive NVIDIA-GPU process viewer, the one-stop solution for GPU process management. However, it is not installable on my system via pip install, not via compilation from the source.
The information on the Web site on how to fix the dependency on
nvidia-ml-py==11.450.51 and how to fix it could be better described
4.10 Install Issues: pgme
The tool pgme could not be installed on Linux as its instructions were incomplete and did not work even after installation of go with
sudo snap install go --classic
Conclusion
We have shown you several tools for monitoring your GPUs. We found that these tools are incredibly useful to make sure your system operates properly. This is especially the case for showing workloads and temperatures, as well as the available software versions to interact with the cards.
Which one of the tools you like maybe a personal choice. Although
nvidia-smi is the go-to tool, others provide quite good insights
while visualizing historical trends enhancing the experience when you
for example, run workloads over time.
We naturally like nvidia-sm as it simply works and you can customize
its output, while repeatedly displaying its values with watch.
Form tho other tools we liked nvtop do its graphical history,
‘gmonitorfor displaying the values in a diagram, andglancesfor more then GPU information. If you are really tight in space,gpustat`
may be for you. All other tools could unfortunately not easily be
installed.
Please leave us a note about which tools you prefer and let us know about tools that we have not listed here. Make sure they can easily be installed. If you have better instructions on how to install the tools with issues on Ubuntu 20.04 LTS please comment or provide us a pointer. We will then try it out and update this post.
6 - Example test
print("test")
print()
7 -
Python related tutorials